| Modeling
the Mobile V2 Batterie
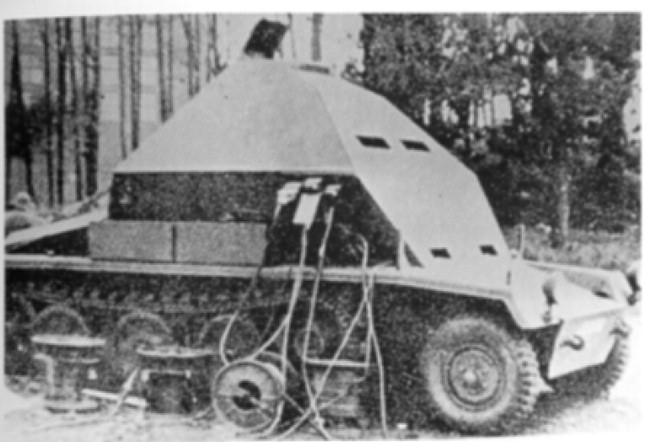
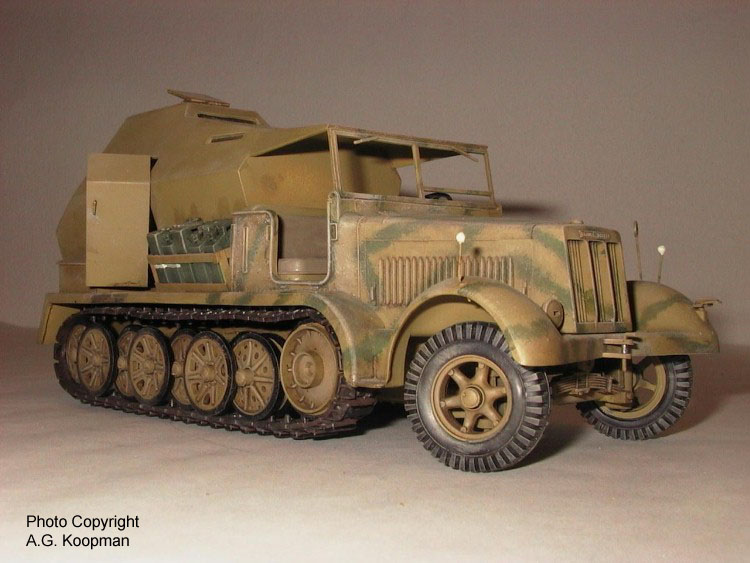
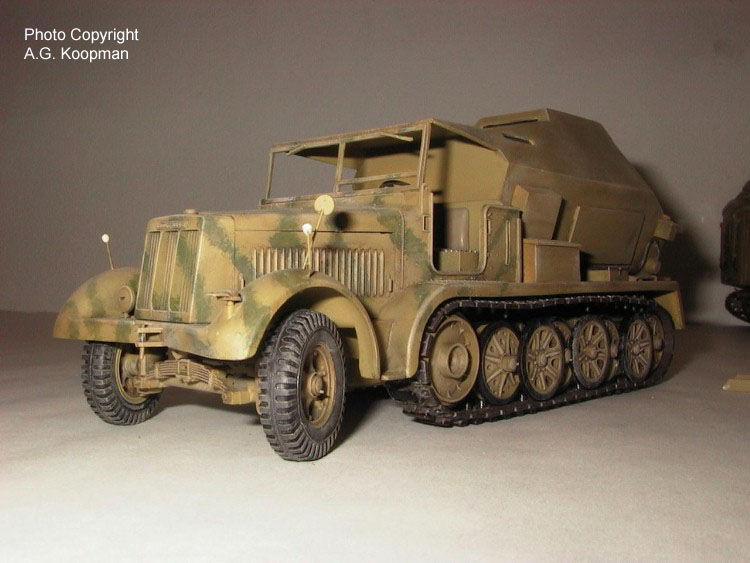
THE FEUERLEITPANZER (Launch Control Vehicle) MAY 2001 - In this article we take a look at the Feuerleitwagen this vehicle was the heart of the hole launching operation. To say it in German; Der Sonder-Kfz. mit gep. Specialaufbau Der Feuerleitwagen.
When we look in the publications about the V2 and its vehicles we will find that there where two types of Feuerleitpanzers. In some articles or books you will find type A and in others type B, and other publications tell us that both were used. But as far as we know, there was only one operational vehicle and it was type B. Specification of the types: Type A As far as we now of there was only
one vehicle built of this type. It was based on a undercarriage build by
Büssing-NAG for the 7.5 cm Selbstfahrlafette L/40.8. There where
four of these undercarriages built (Fahrgestell Nr 2009 bis 2012). The
original name was Pz.Slf.III auf Fahrgestell m. Zgkw. 5t (HKp 902).
The engine was built in at the rear of the vehicle. The weight was 11000
kg in the original state. The panzer armor plating was 6-20 mm. It was
powered by a Maybach HL 45150 hp engine top speed 50 km/h. Two of these
vehicles where seen in the African Theater, and one was later in the war
converted to a Feuerleitwagen. This is the vehicle that we see on photos
of Peenemünde Test Stand VII and on some Blizna movies and photos.
The best descriptions of this vehicle came not from V2 archives, but from
those of the panzer vehicle descriptions. You had to be a Panzer model
builder to find a description. The info above comes from the book Die
Halbketten Fahrzeuge des Deutschen Heeres 1909-1945.
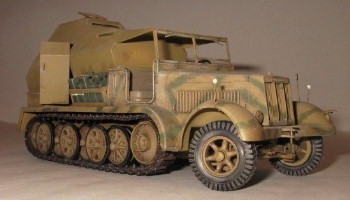
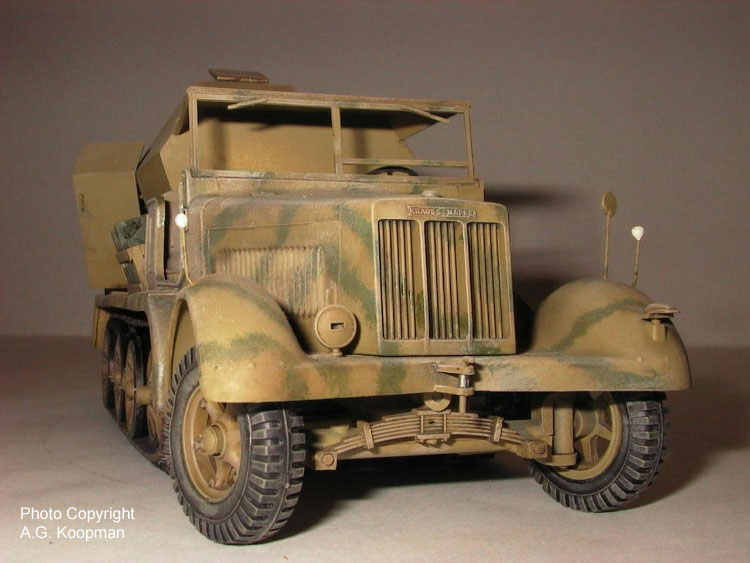
Type B This is a more familiar type of undercarriage.
It is based on the very widely used Sd.Kfz.7 made by Krauss-Maffei / Daimler-Benz
and Büssing. Powered by a Maybach HL 52 TU with 115 hp. This vehicle
saw a wide range of use in the German army, one of them was the Sd.Kfz.7
mit gep Specialaufbau. This is the vehicle that will be built for the model
V2 launching site. And we, the 1/35 scale modelers, are lucky to find this
kit in the collection of the Japanese company TAMIYA.
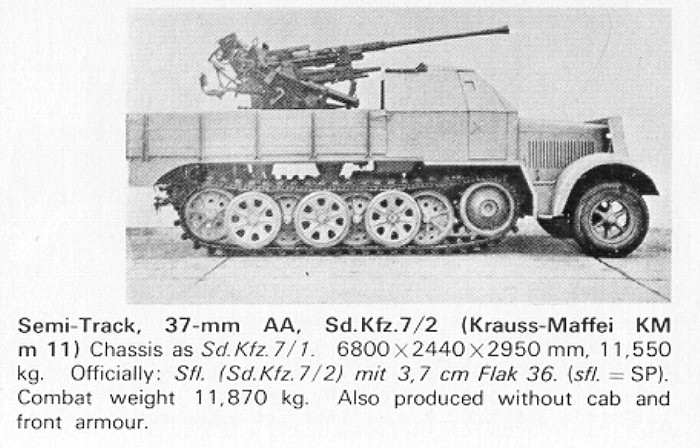
This Sd.Kfz.7 model is available
in three differed versions made by TAMIYA. But we can only use the Types
7 and 7/1 (the model 7/2 with the 37 mm AA gun can not being use because
the armored driver cabin). So we have now two possibilities to make our
Feuerleitwagen, scratch building or using the conversion set of AZIMUTH.
For the scratch building project we have the drawing out the Model
magazine from May of 1976. The Conversion set is made by Azimut
and seems to be a good set. In both cases you have to follow the drawings.
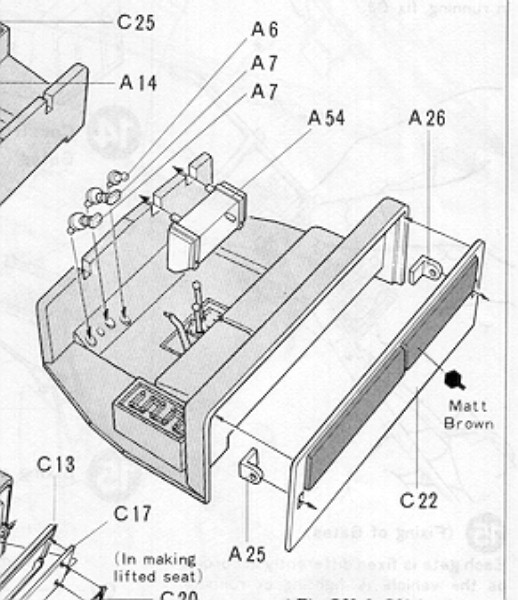
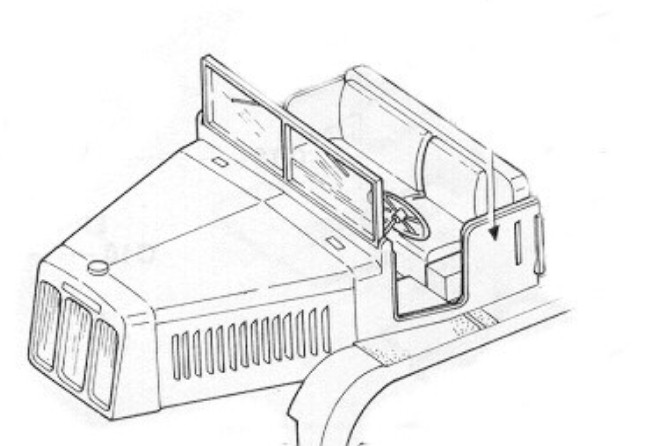
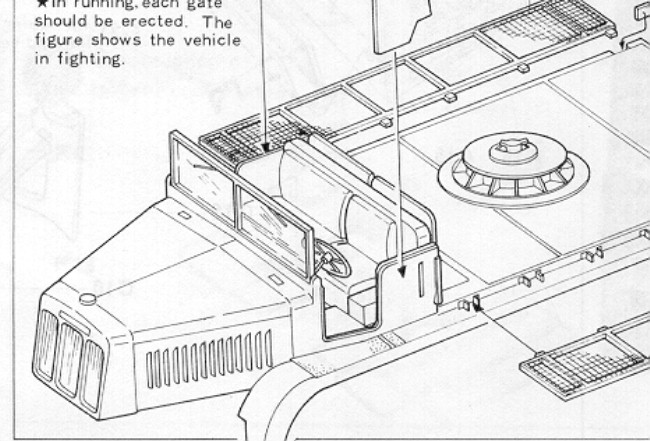
In fig. 13 we see that the motor
hood and driver cab are placed on the body plate. We have to saw/cut off
everything behind the cabin from this plate and we will not use this!
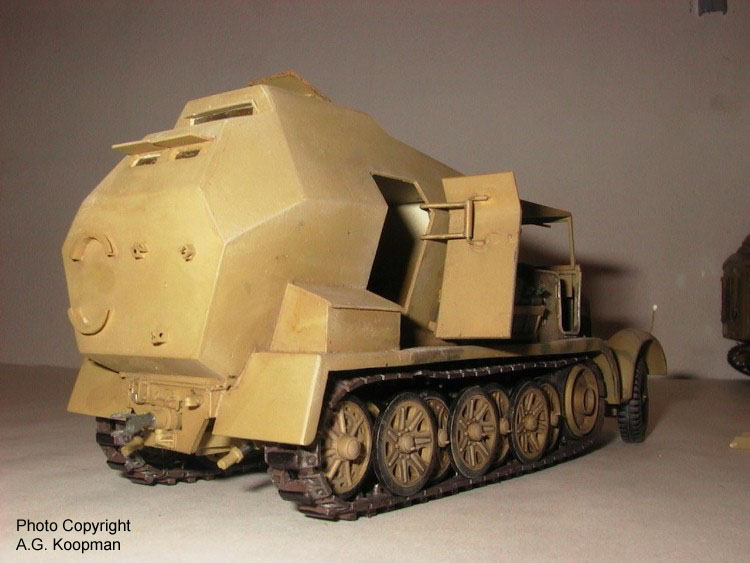
Fig. 14 and 15 are also not in use for this model, only the parts of fig. 16 need to fixed on the model. Now we have to do the more serious work of the scratch building or the resin conversion set. The scratch building is really not so difficult as it may think. This model has no curves only straight plates and by the use of the drawing it is good to make. It is advisable to buy the following book, certain when you think about building the hole site, Allied - Axis Photo Journal of the Second World War Issue 1. It is containing 27 page of photos of the British operation Backfire, this operation is also described on the V2 Resource Site. For the scratch built model we can use every thickness of plastic sheet but don't use to thin 1.5 to 2 mm is nice plate. For the sights you can use a piece of perplex off 0.5 mm. Part no 11 (teil 11) the hinges of the manhole are false (take a good look at page 27 of the Allied-Axis book) - they came from the inside of the vehicle. The same problem with the door at part no. 4 (teil 40) the door hinges are from the inside in the same way as the manhole at the top. In part 1 (teil 1) there is a sight to the front of the vehicle (see page 23 Allied-Axis book). In part 4 (teil 4) there is a sight (see page 22 of the Allied-Axis book). Be aware that there is only one door to the panzer cabin only the right side of the vehicle has a door! Now some info on parts on the drawing; No 15 (kiste) is the box with the cable sockets. No 14 1e (kiste) is a box with the battery for the instruments (vehicle battery is at the left of the driver seat - see also Allied-Axis page 23). No 14 2e (kiste ) is equipment storage and it has to be placed left of the cabin door (see also Allied-Axis page 22). Then there are on the left side at the rear two items. A square box and a round box the square is a power socket with 4 poles, two fore 220v ~ and two for 27v = voltage. At part 2 (teil 2) there are on the left two half round items these are possibly a stowage for a cable, the three point star at the left is the stowage point for the spare wheel. The soldier figures of this model
are also not to be used for the launching site.
Painting the vehicle - The general color is German yellow, see also the first part of building the model launch site where we deal with the colors. For the driver's cabin use the paints advised on the TAMIYA drawing. The inside of the cabin is a light gray color. When you don't have the Allied-Axis book the German number plate at Cuxhaven is WH 940 221. ABSCHUSSPLATTFORM | OPEL BLITZ | HANOMAG SS-100 | FEUERLEITWAGEN |